Knots To Know

Knots. Many are challenging to learn, let alone remember how to tie. Tying some knots takes time, too much of it, when you’d rather be fishing. In this day of instant gratification, you won’t find a packaged, ready-to-use Improved Clinch Knot at Bass Pro Shops or Cabela’s. Too bad!

The good news is the inventors of the knots you need to know had the same goal in mind—creating knots that are ideal for any given fishing situation. And remember, a well-tied knot is the most important connection between the hook and the prize itself.

Nautical knots—same thing. Myriad choices are available, but do you really need to know them all? No! Many nautical knots were more necessity than matter of convenience and safety like those of today. Like fishing knots, the nautical versions are designed for specific applications.

Here is a nifty how-to library of the knots you need to know, complete with easy-to-follow illustrations and step-by-step instructions. 

FISHING KNOTS

Palomar knot

BEST FOR: Joining braids to leaders or lures. The Palomar came along years before today’s ever-popular superlines, also making it a good all-around choice for fluorocarbons and monofilaments. It’s quick to tie and with premium line retains 100% of its original strength.

Palomar knot
HOW TO TIE IT:

STEP 1: Double 6 inches of line and pass end of loop through eye of hook.

Palomar knot

STEP 2: Tie a loose overhand knot with hook hanging from bottom.

Palomar knot

STEP 3: Holding overhand knot between thumb and forefinger, pass loop of line over the hook. Slide loop above eye of hook.

Palomar knot

STEP 4: Pull on both the standing line and tag end to tighten knot down onto eye. Clip tag end close.


Clinch knot

BEST FOR: The Improved Clinch is a time-tested and a very popular choice for tying terminal tackle—including lures—to monofilament line. It is quick and easy to tie. It can be difficult to tie in monofilament and fluorocarbon lines testing greater than 25 pounds breaking strength. It is not recommended for braided line.

Clinch knot
HOW TO TIE IT:

STEP 1: Thread end of line through eye of hook. Double back making 5 or more turns around standing line.

Clinch knot

STEP 2: Bring end of line back through the first loop formed behind the eye then through the big loop.

Clinch knot

STEP 3: Wet knot and pull on tag end to tighten down the coils. Slide tight against the eye and clip tag end close.


Double Unit knot

BEST FOR: When you need to quickly re-tie hooks and baits in the heat of the action. This knot is used by anglers in salt- and freshwater for joining lines of similar or different strengths. It works well, and some find it easier to tie than the Blood Knot.    

Double Unit knot
HOW TO TIE IT:

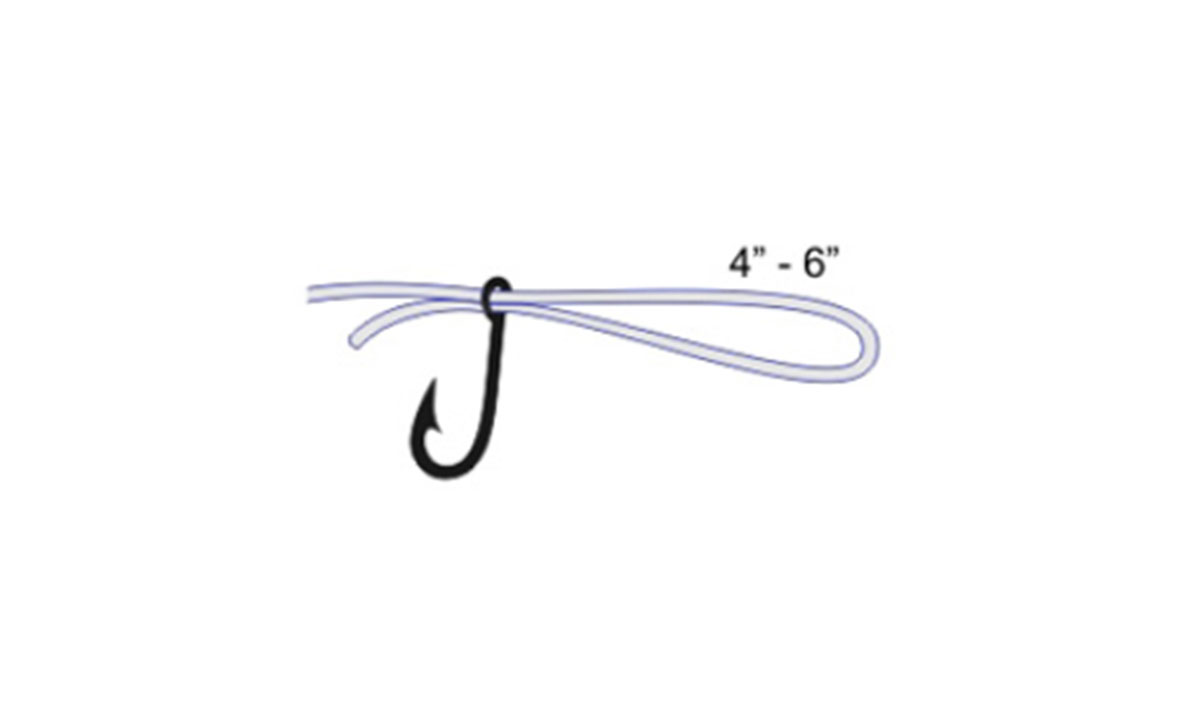
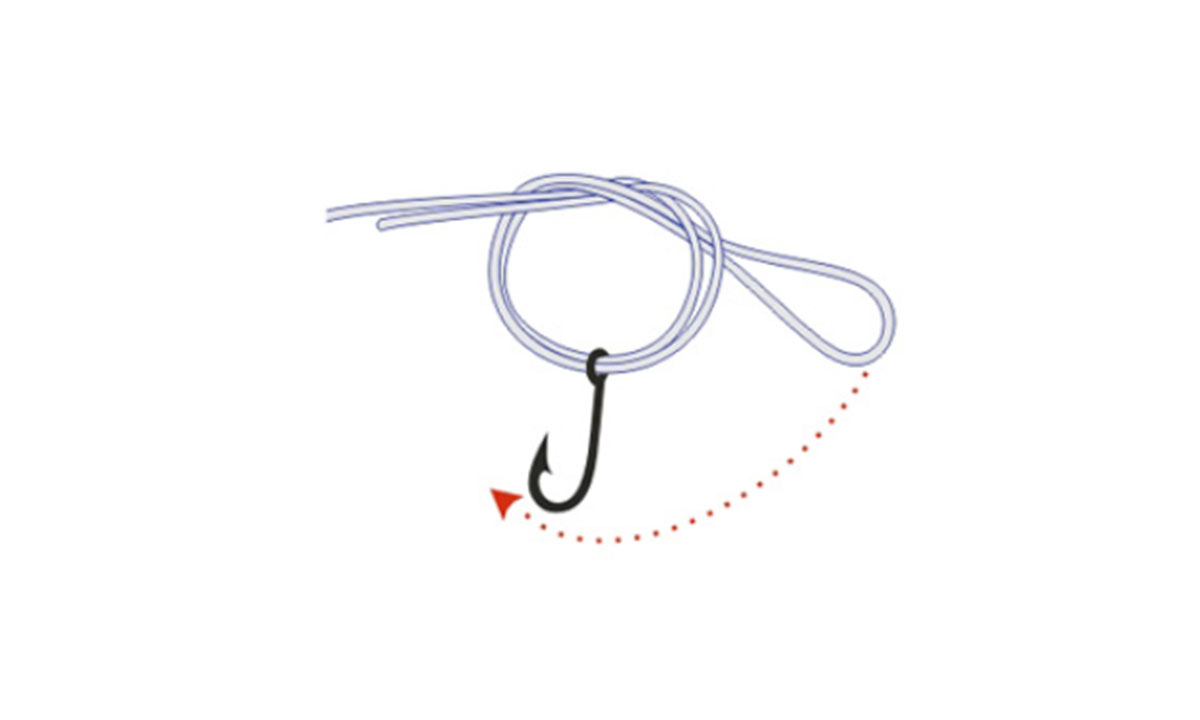
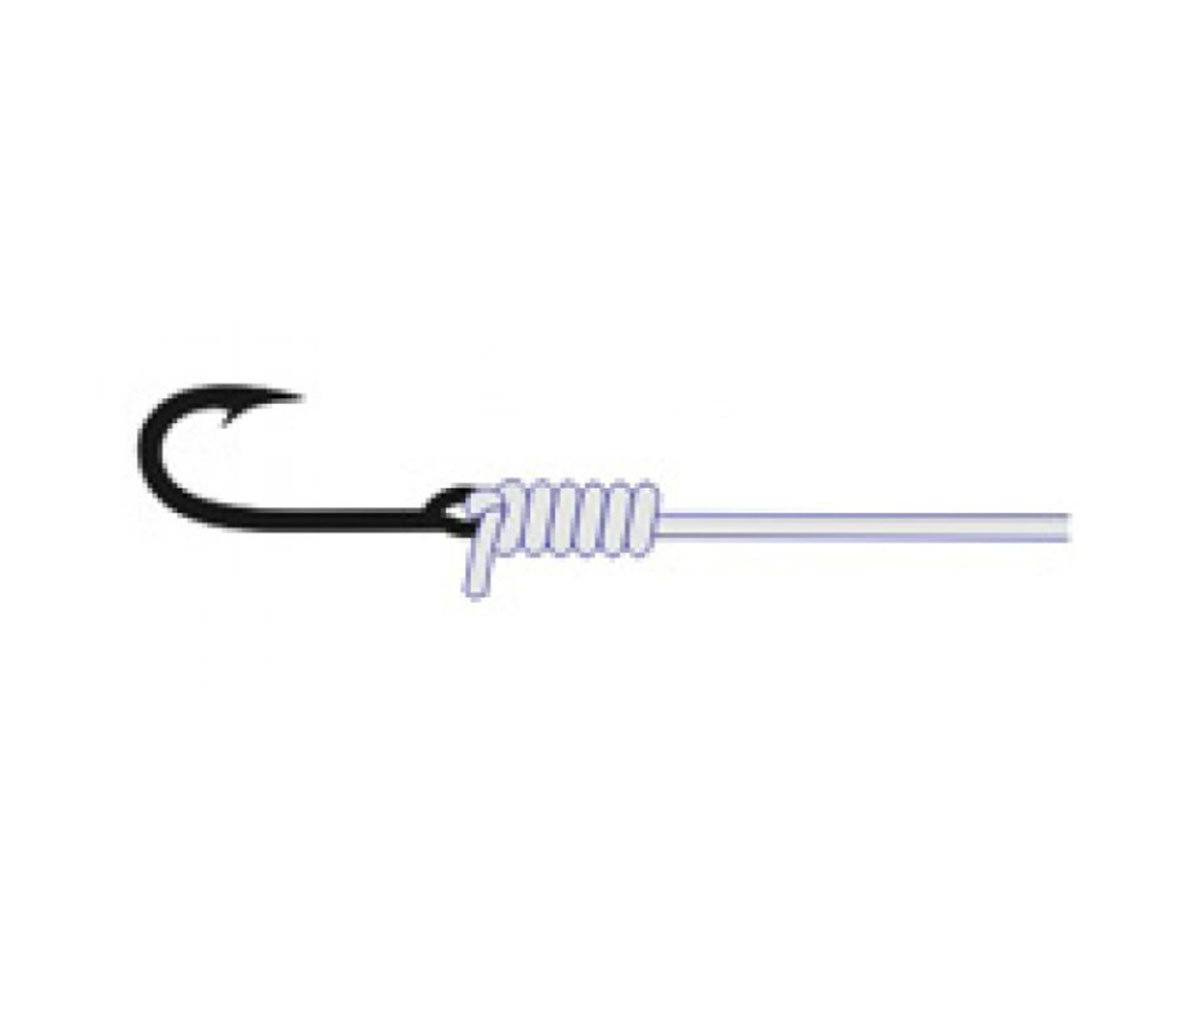
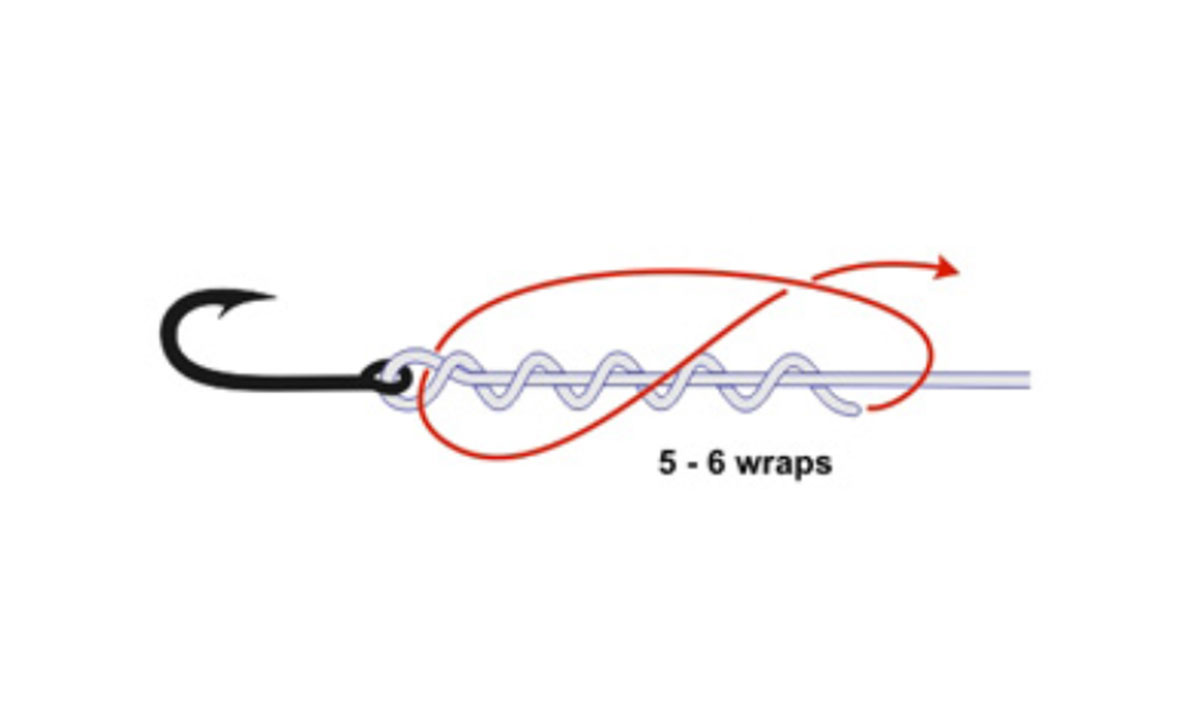
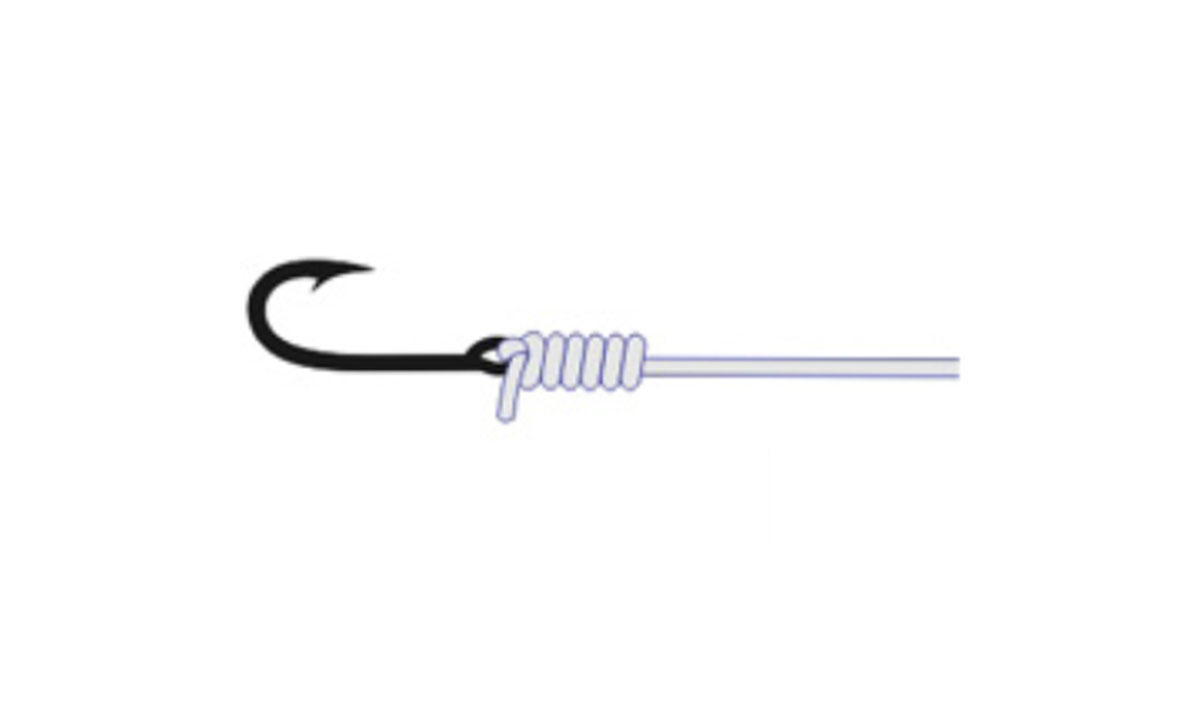
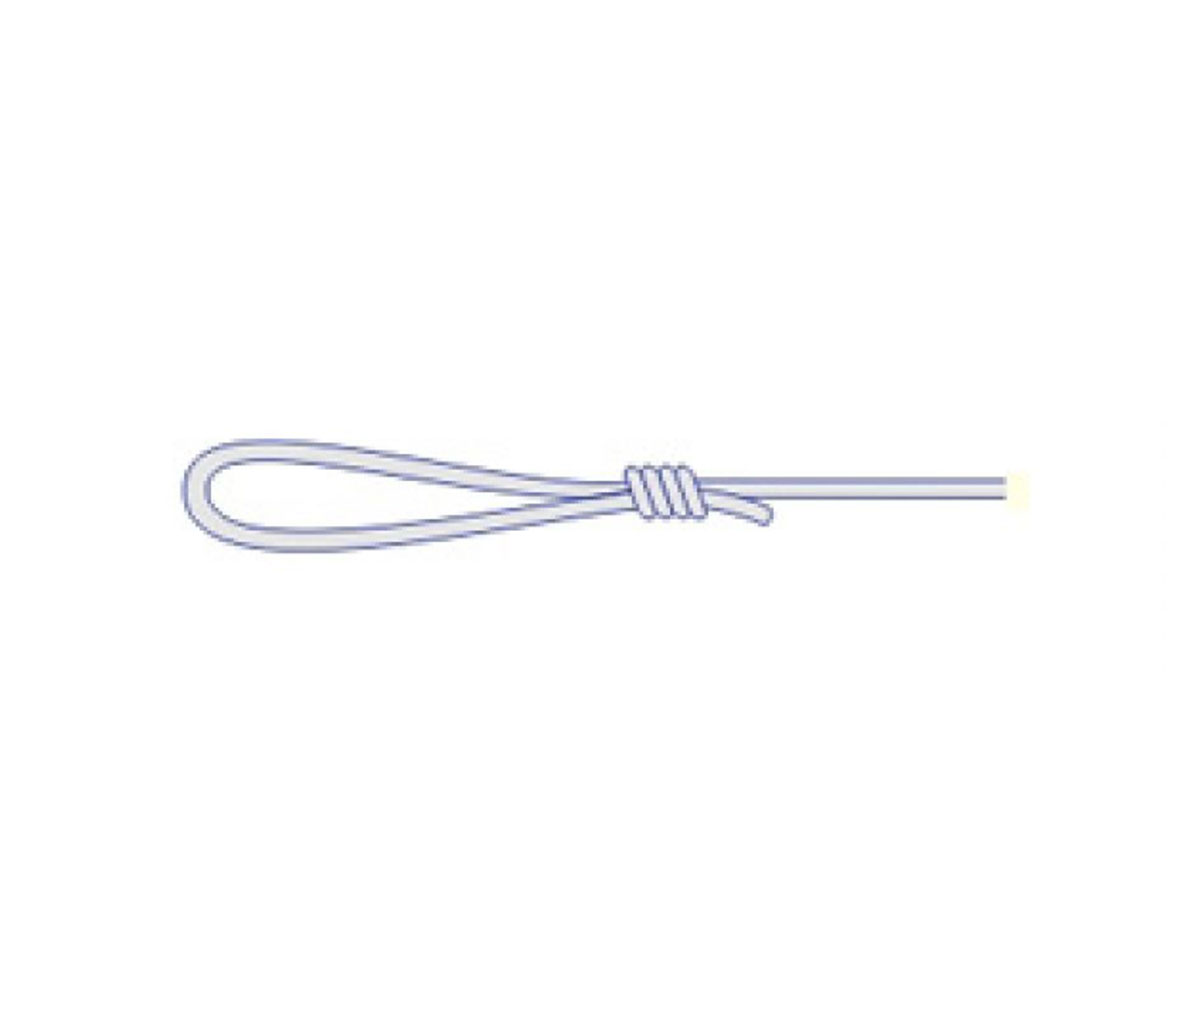
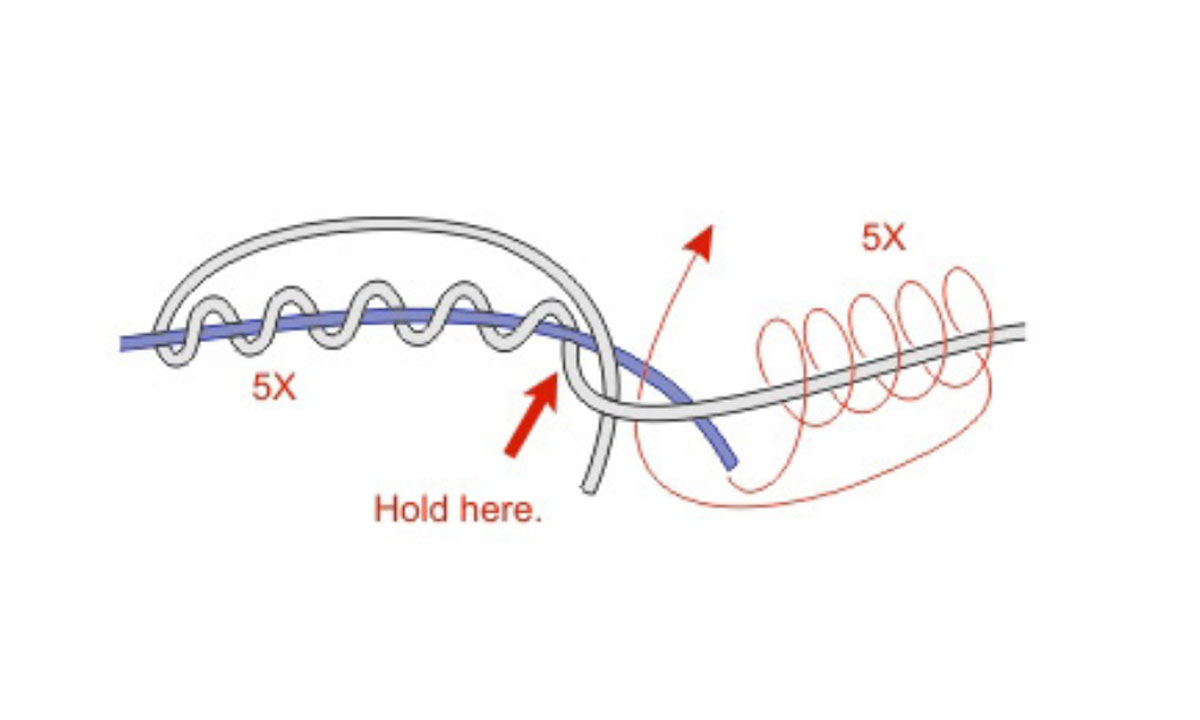
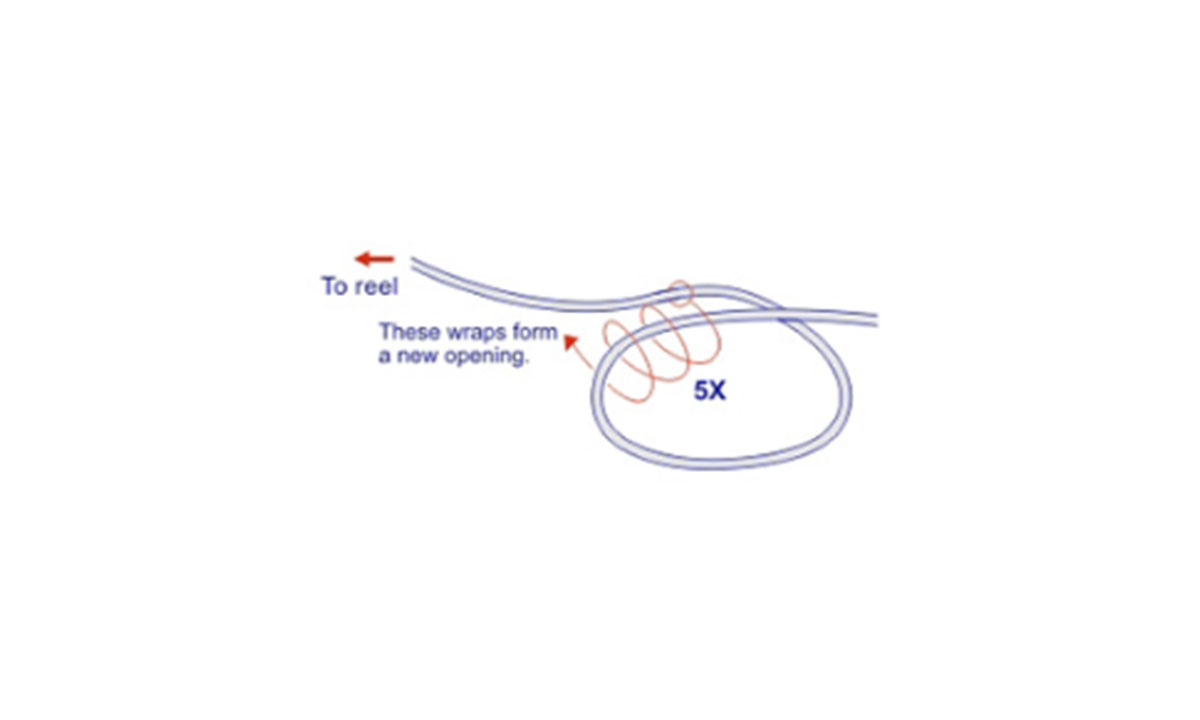
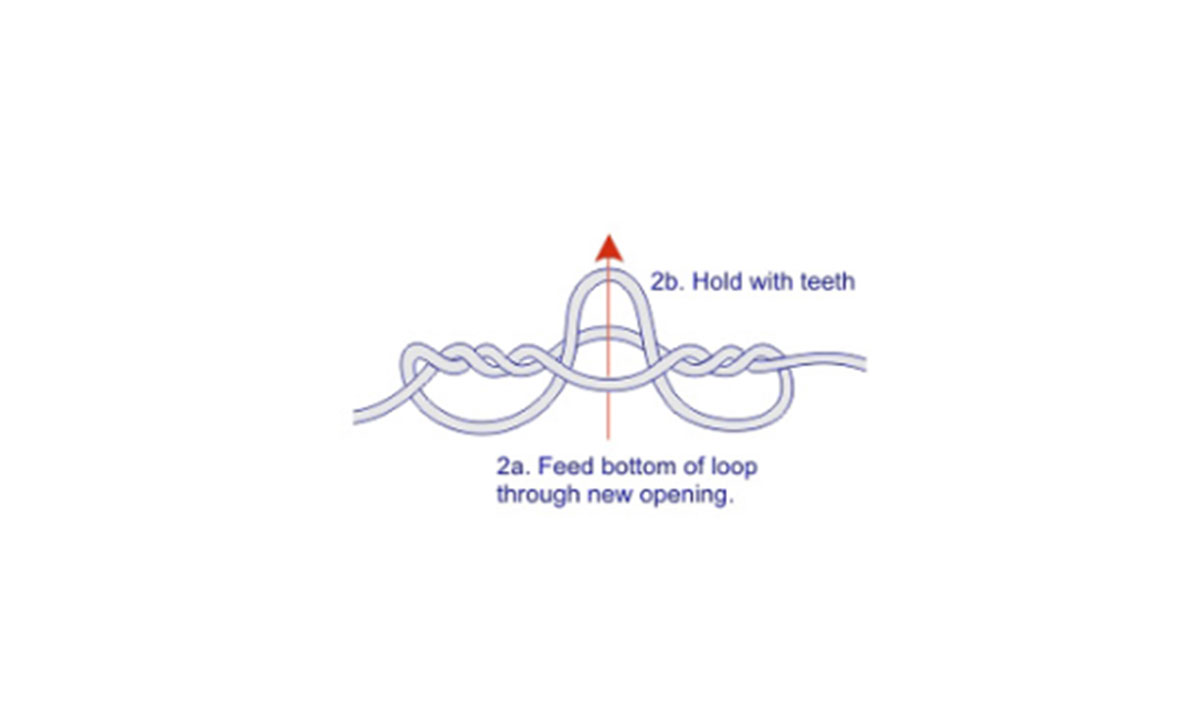
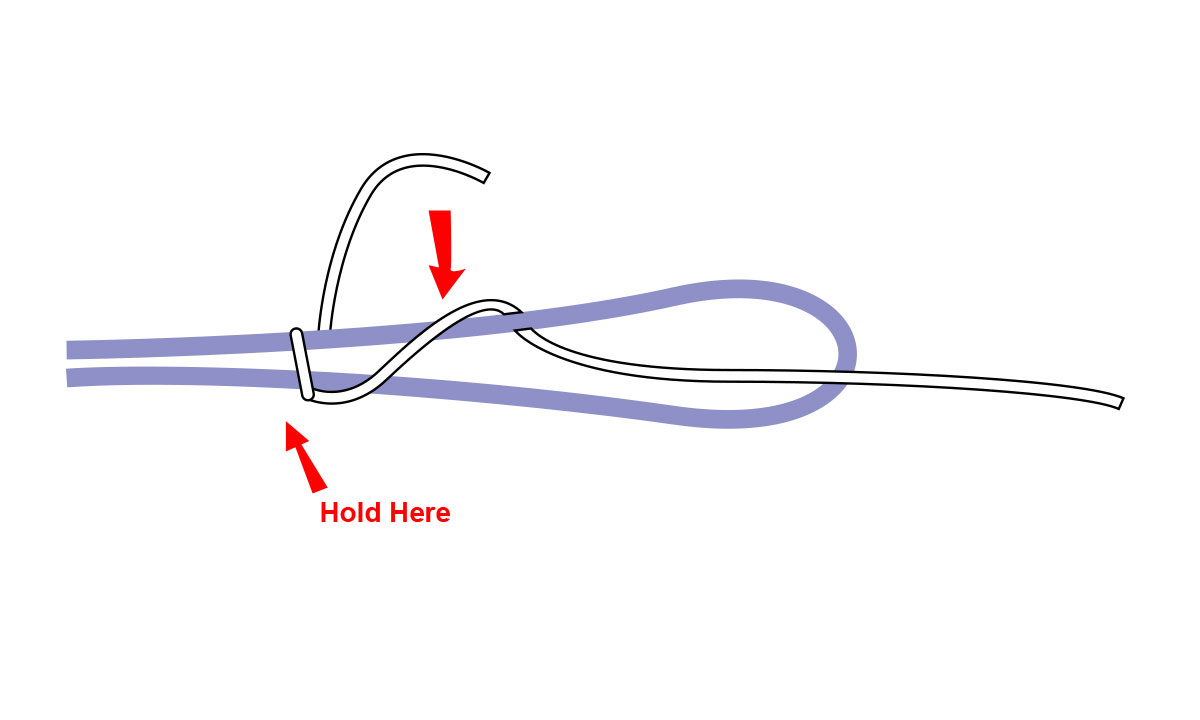
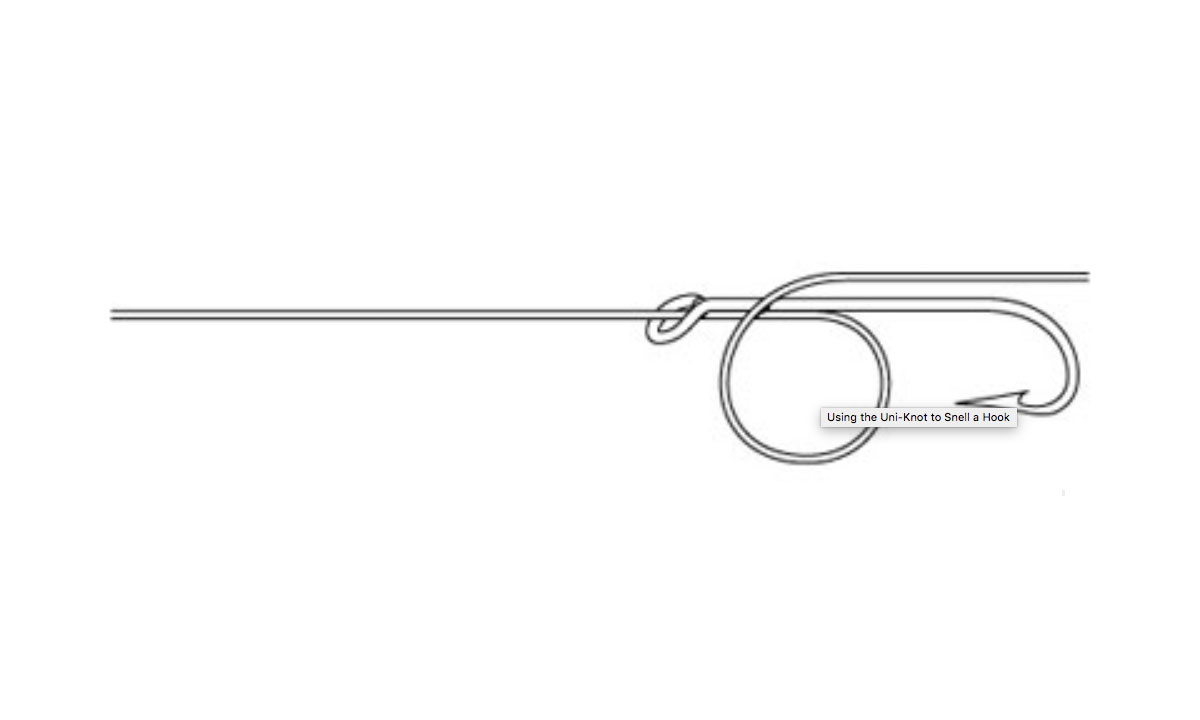
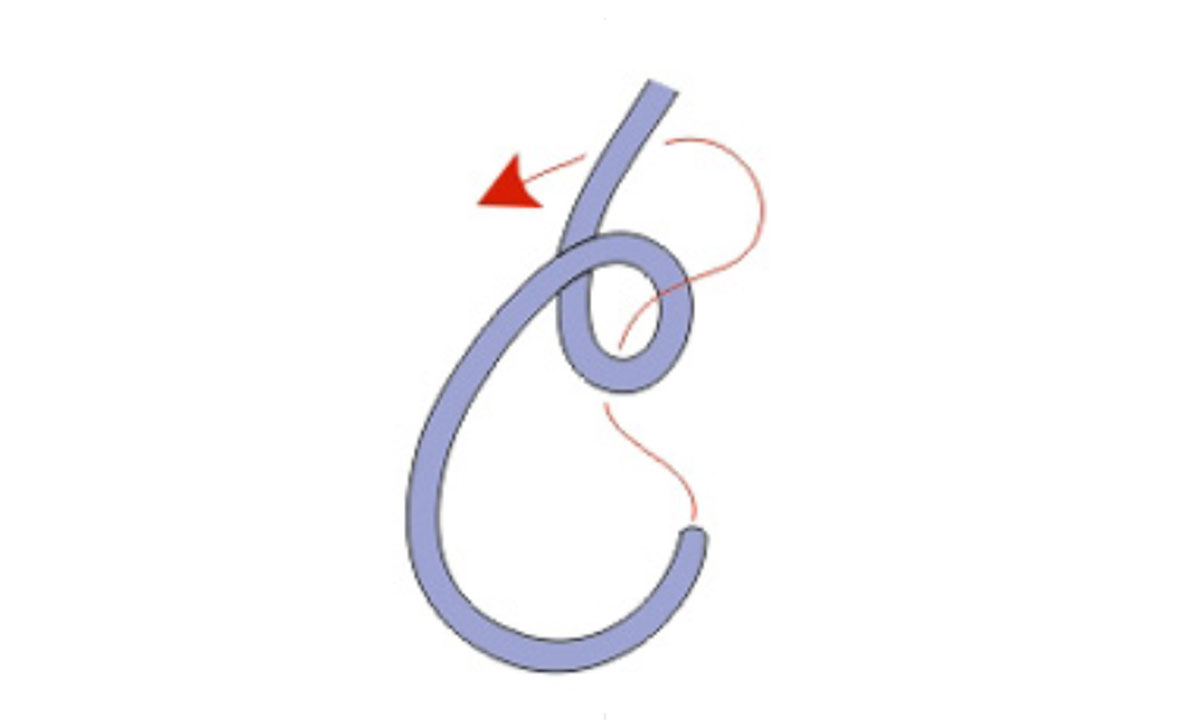
STEP 1: Overlap the ends of lines to be joined. Take the end of the line from the left and double back and make 3 to 4 wraps around both lines and through the loop that was formed. Pull tag end to tighten. (Note: When tying mono to braided line, make 5 turns with the mono and 8 turns with the braid.)

Double Unit knot

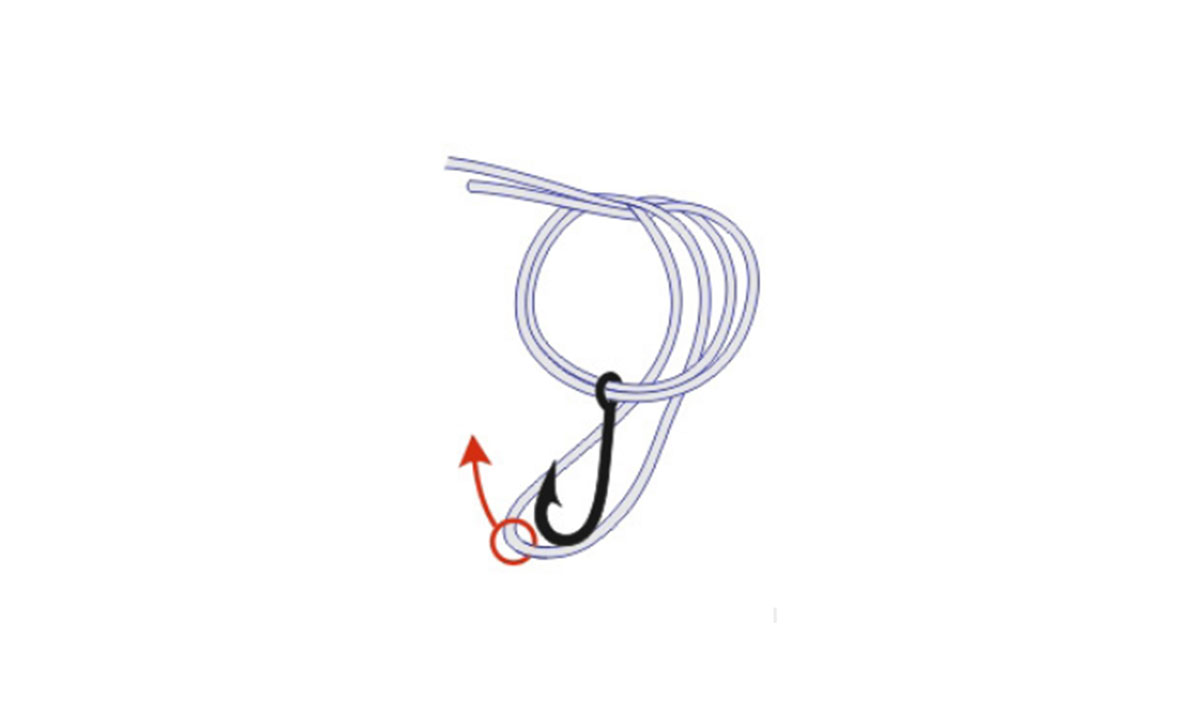
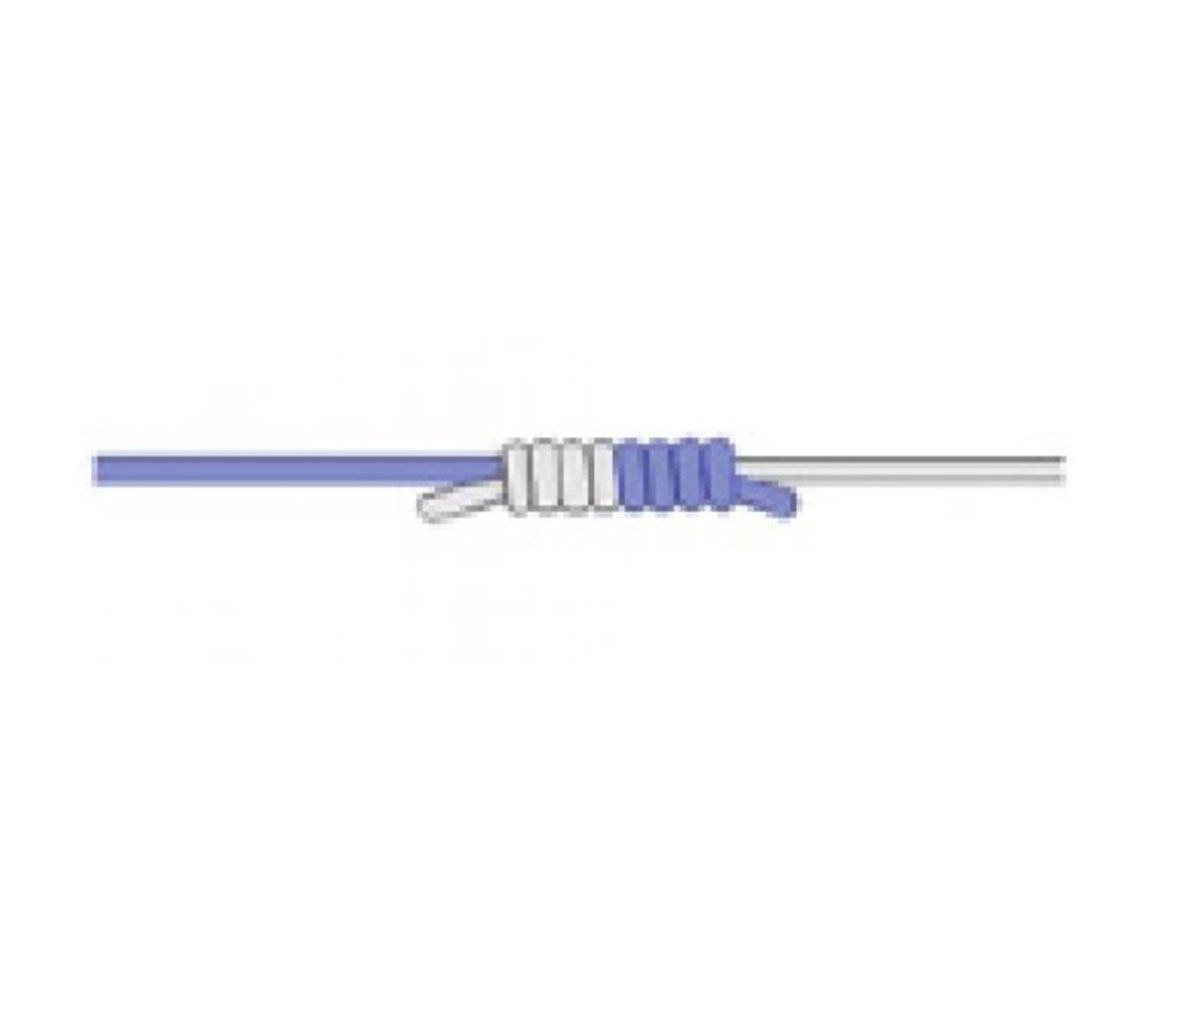
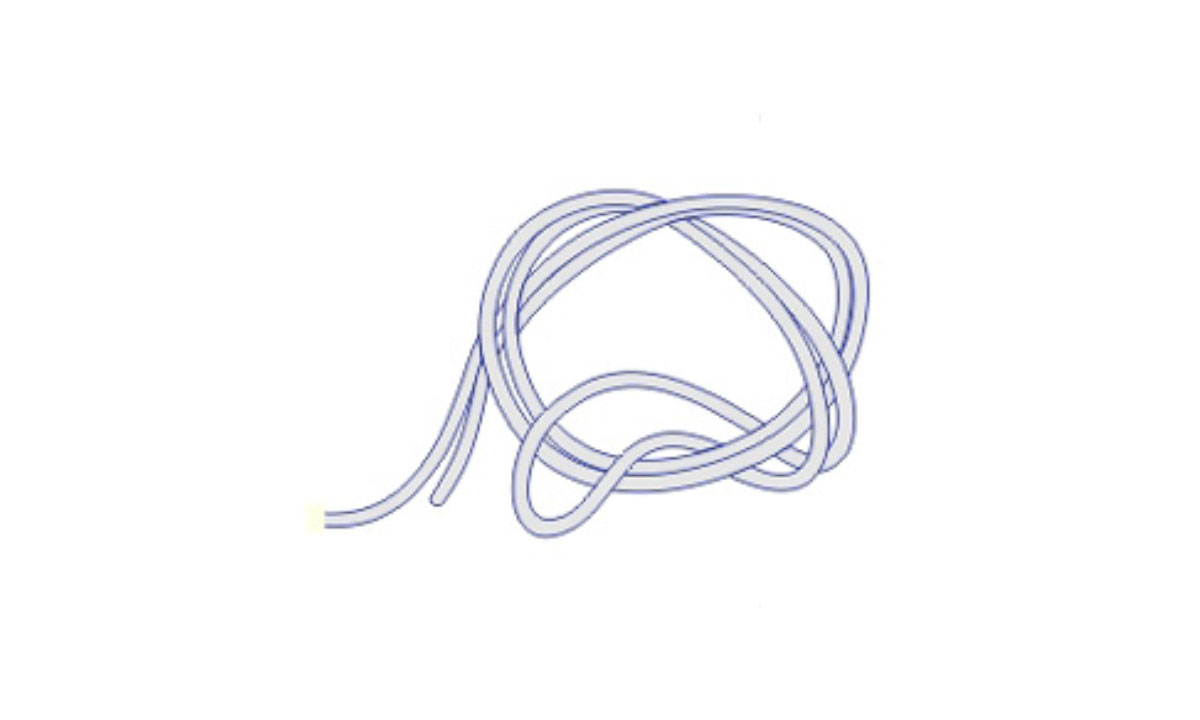
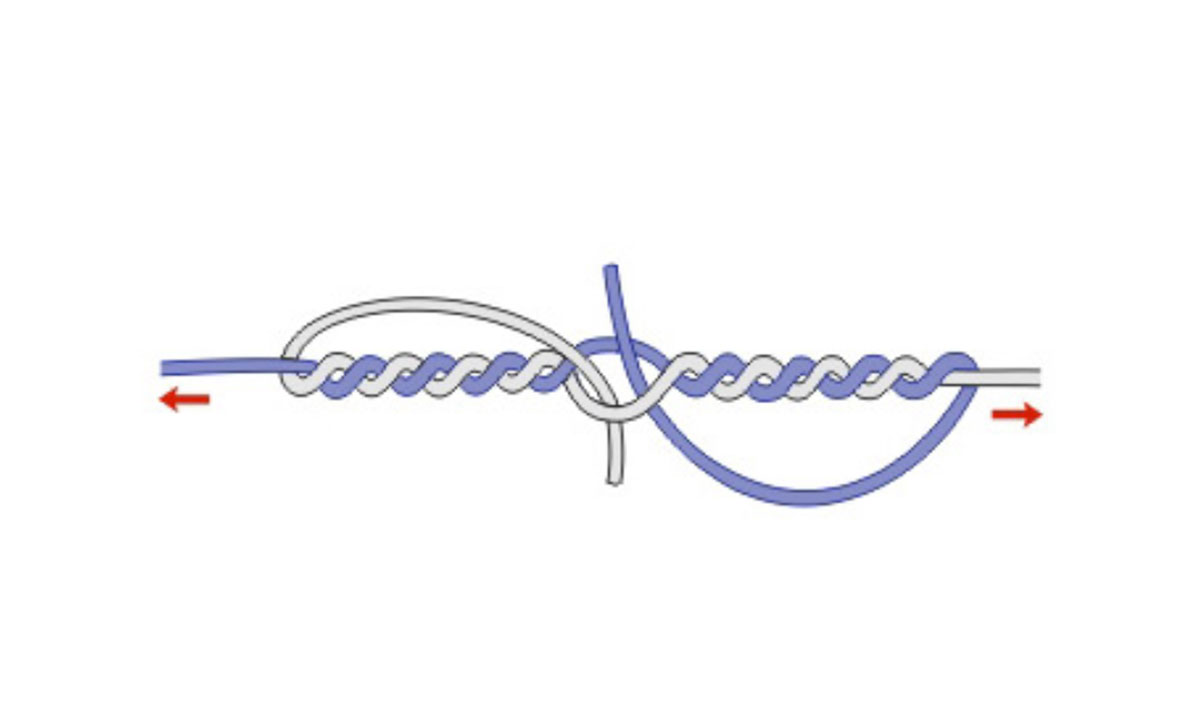
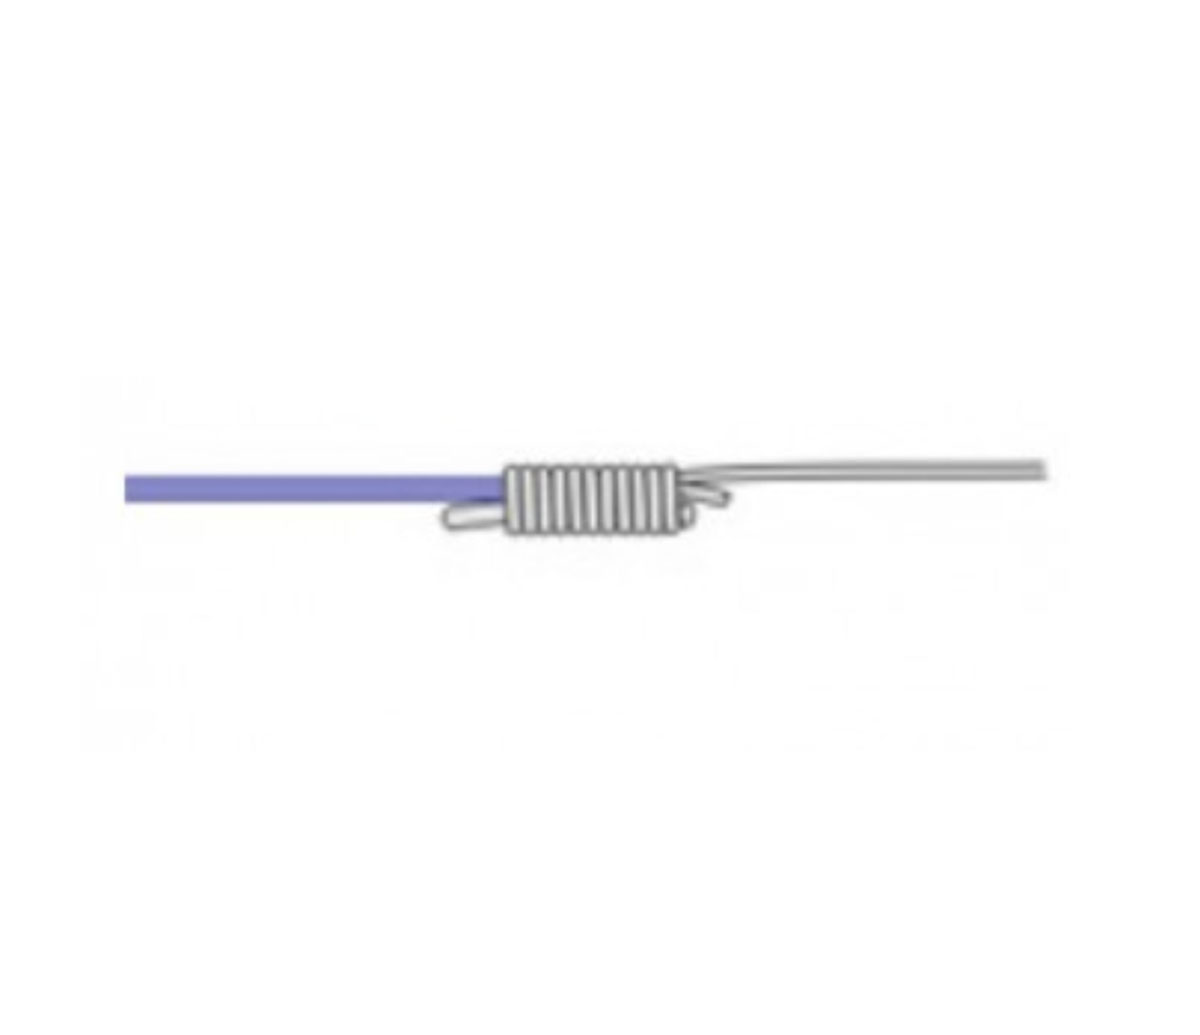
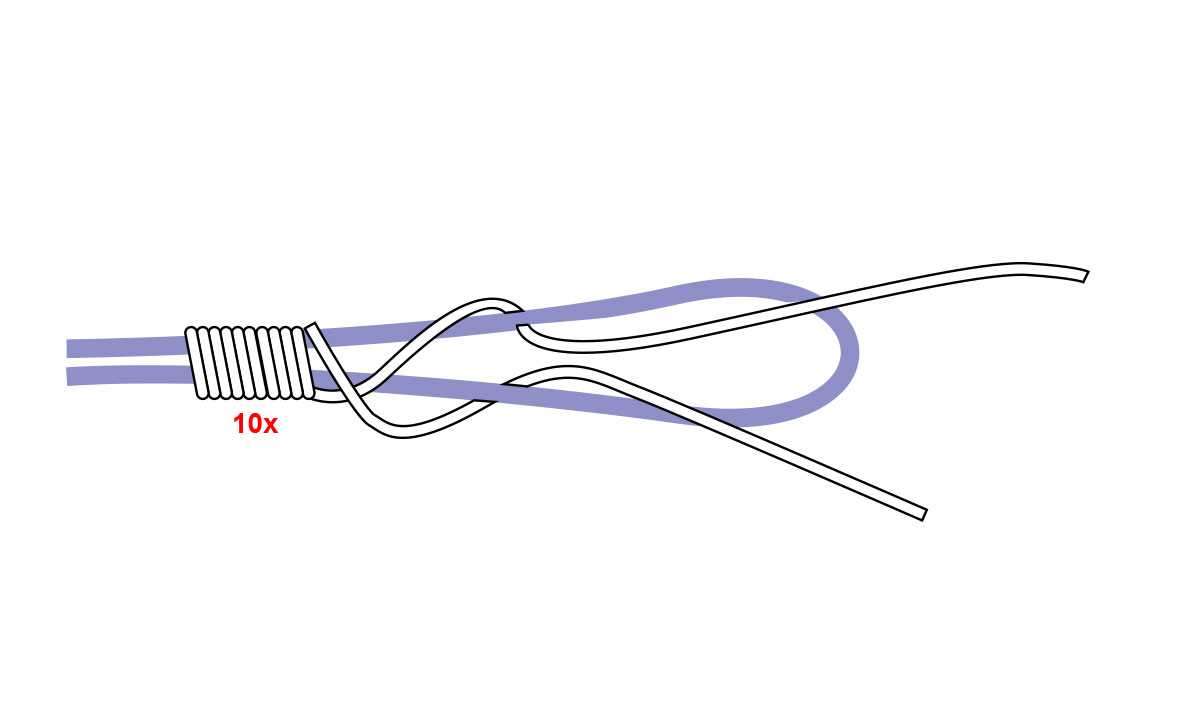
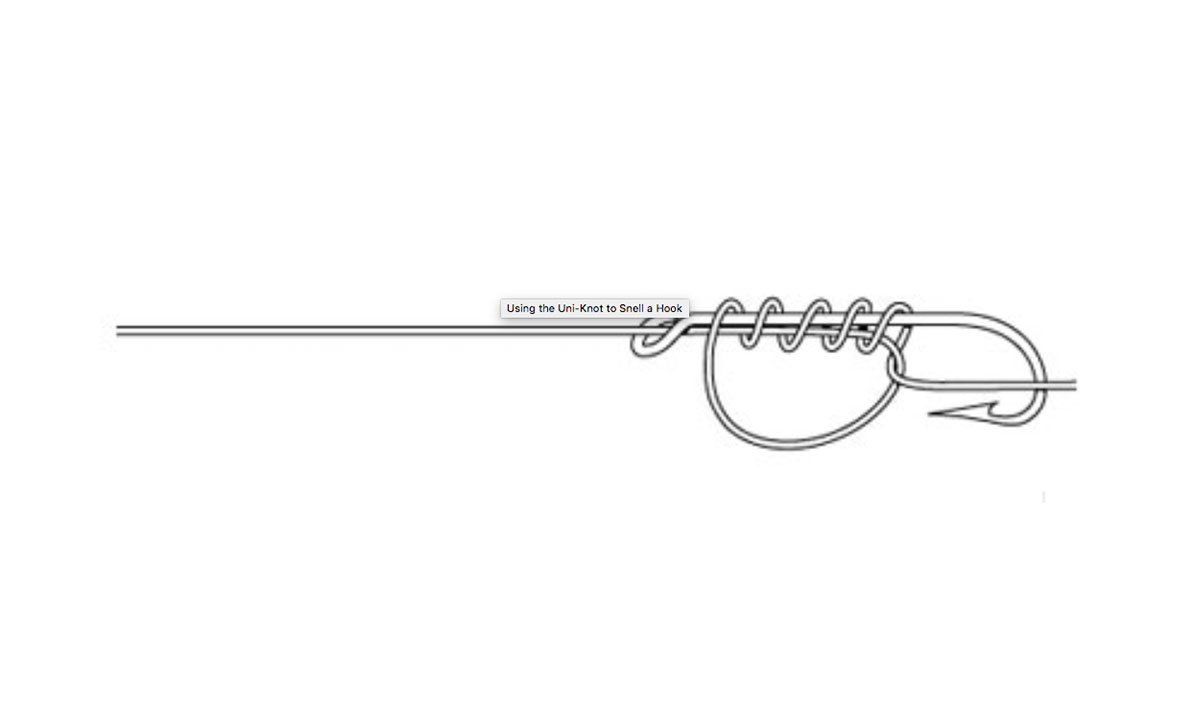
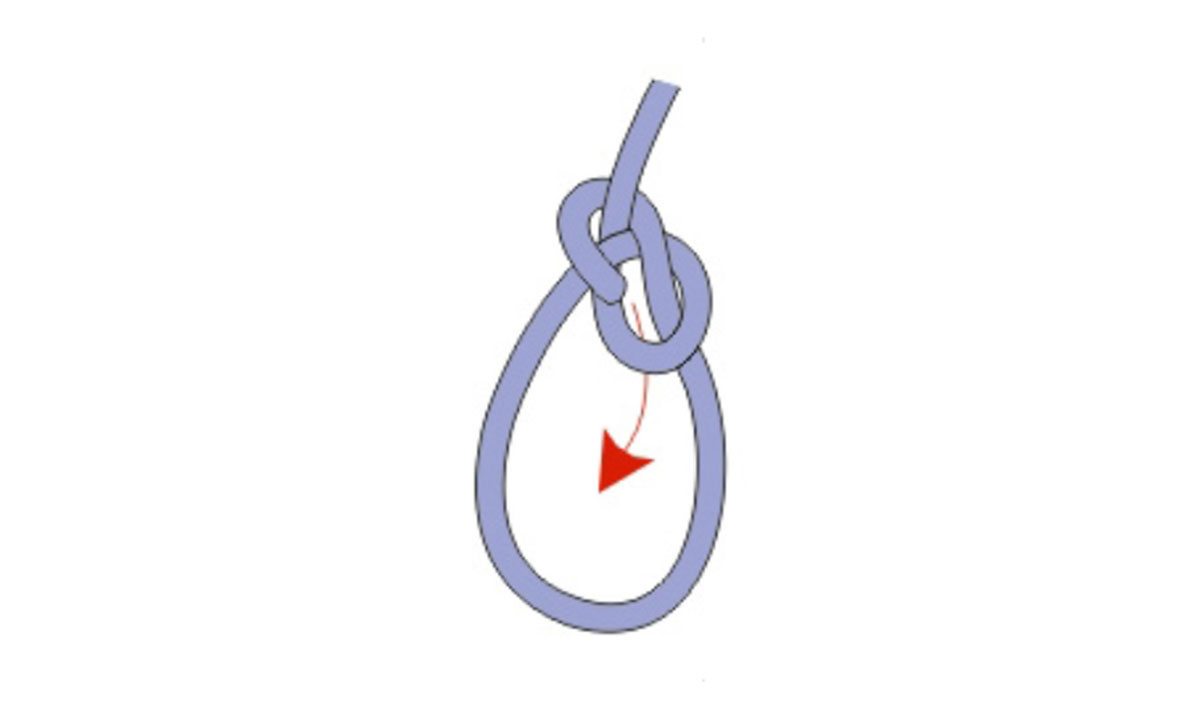
STEP 2: Repeat with the end of the line on the left making the same number of wraps unless tying with braided line in which you should double the number of wraps.

Double Unit knot

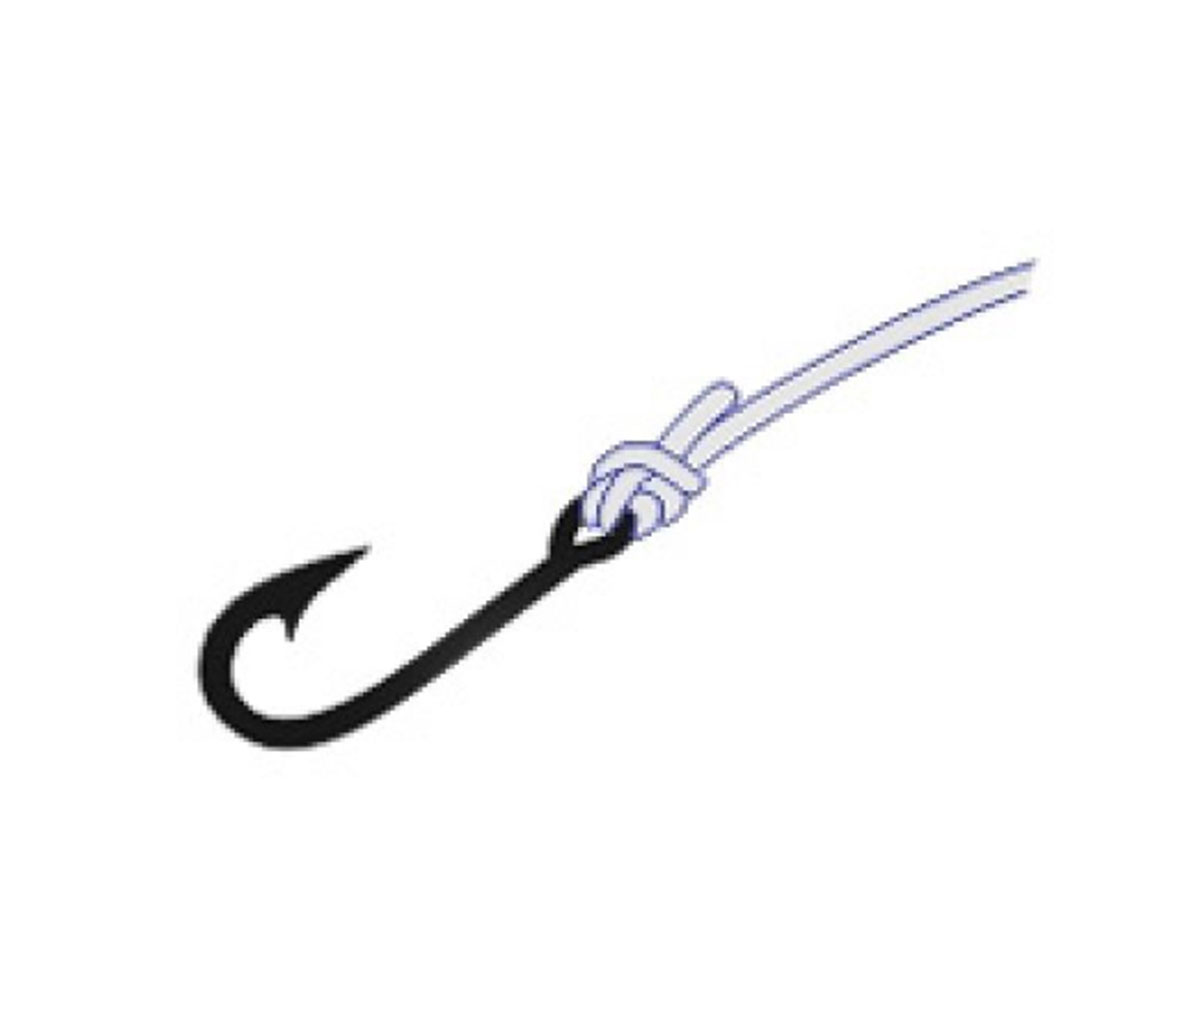
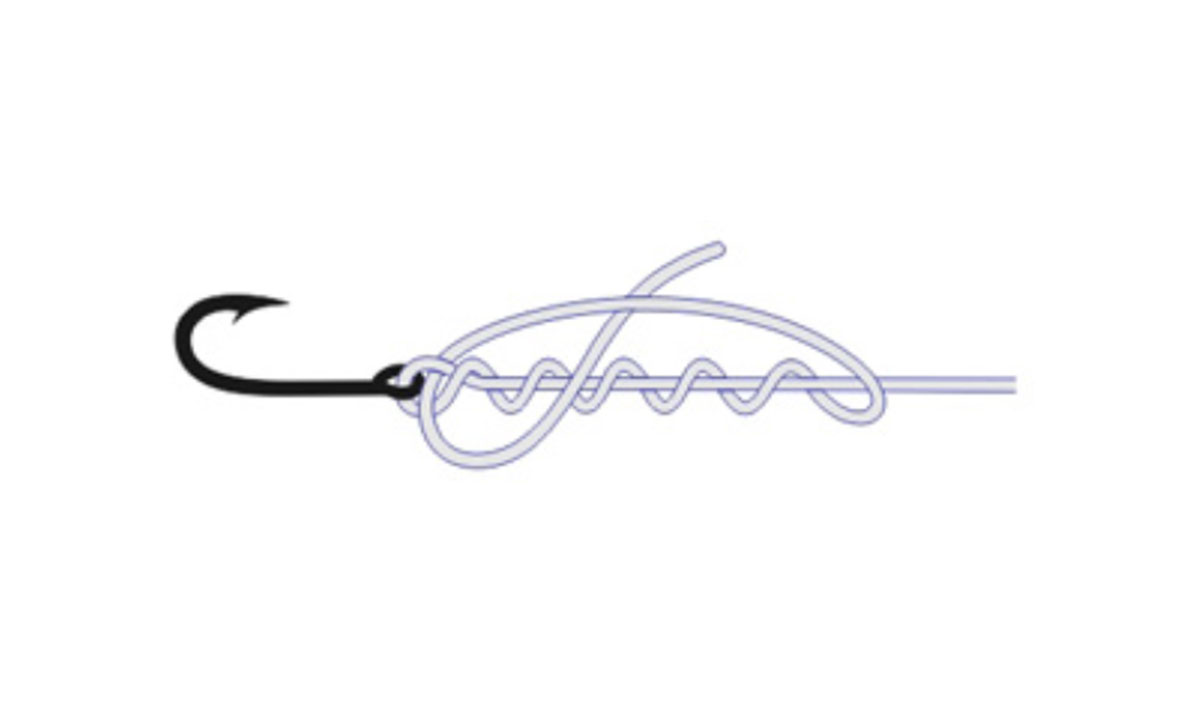
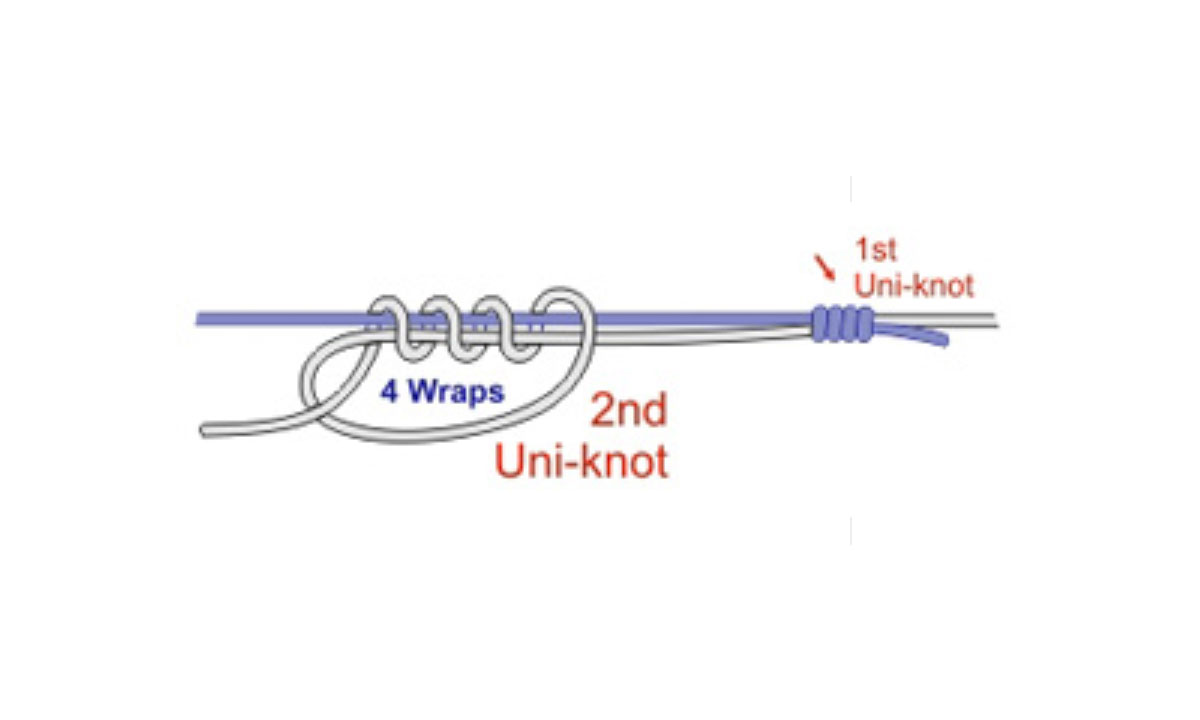
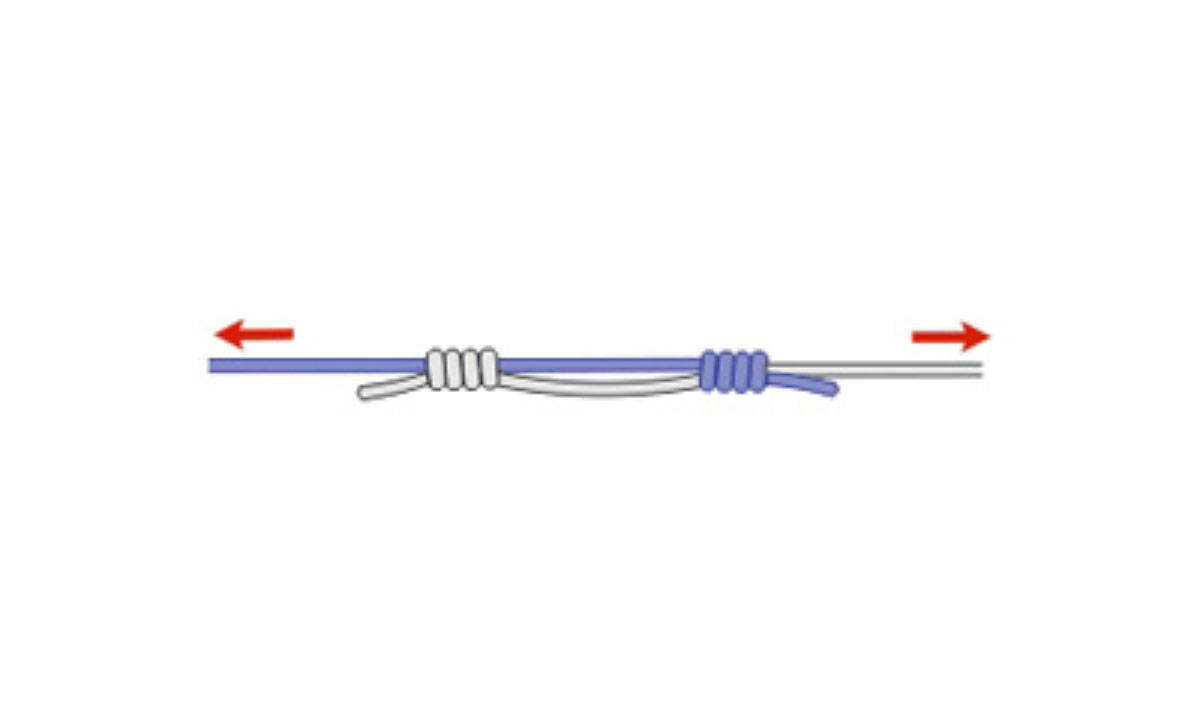
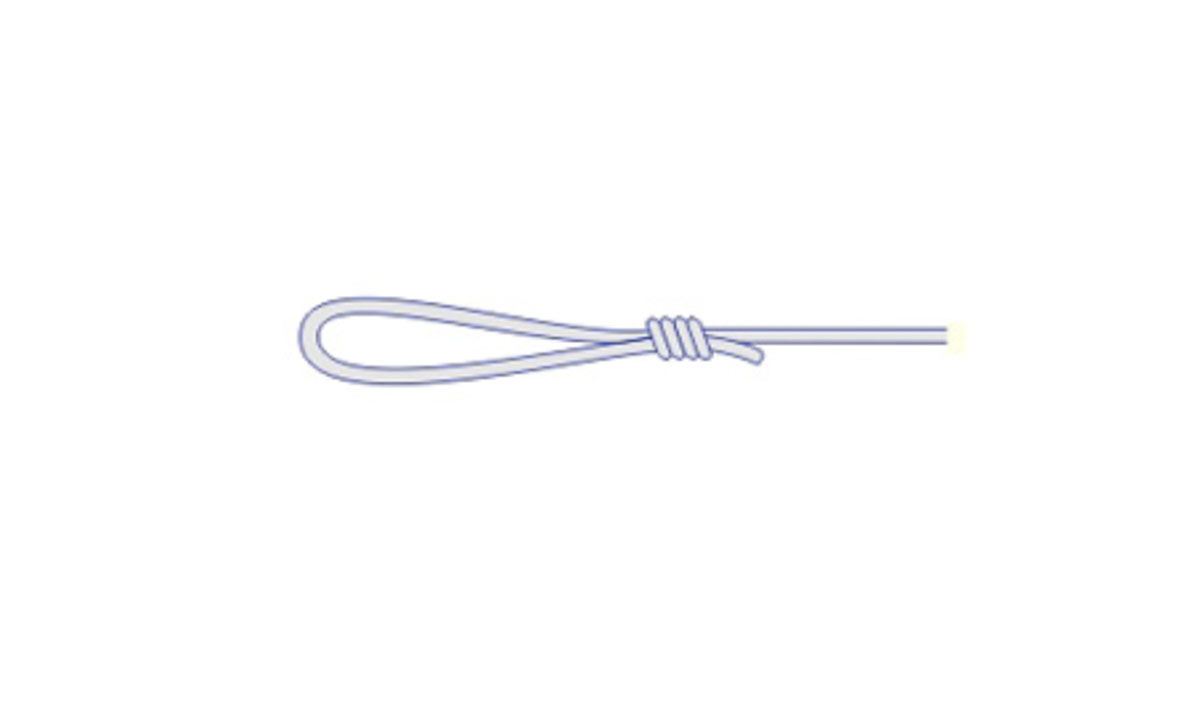
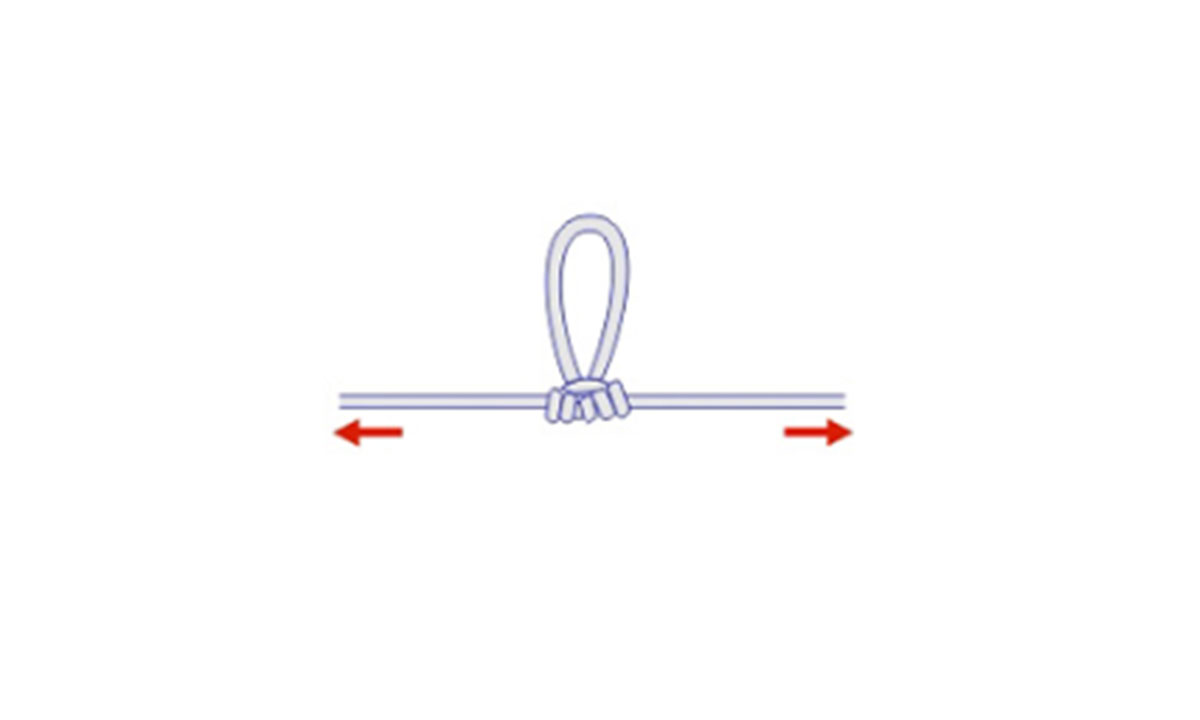
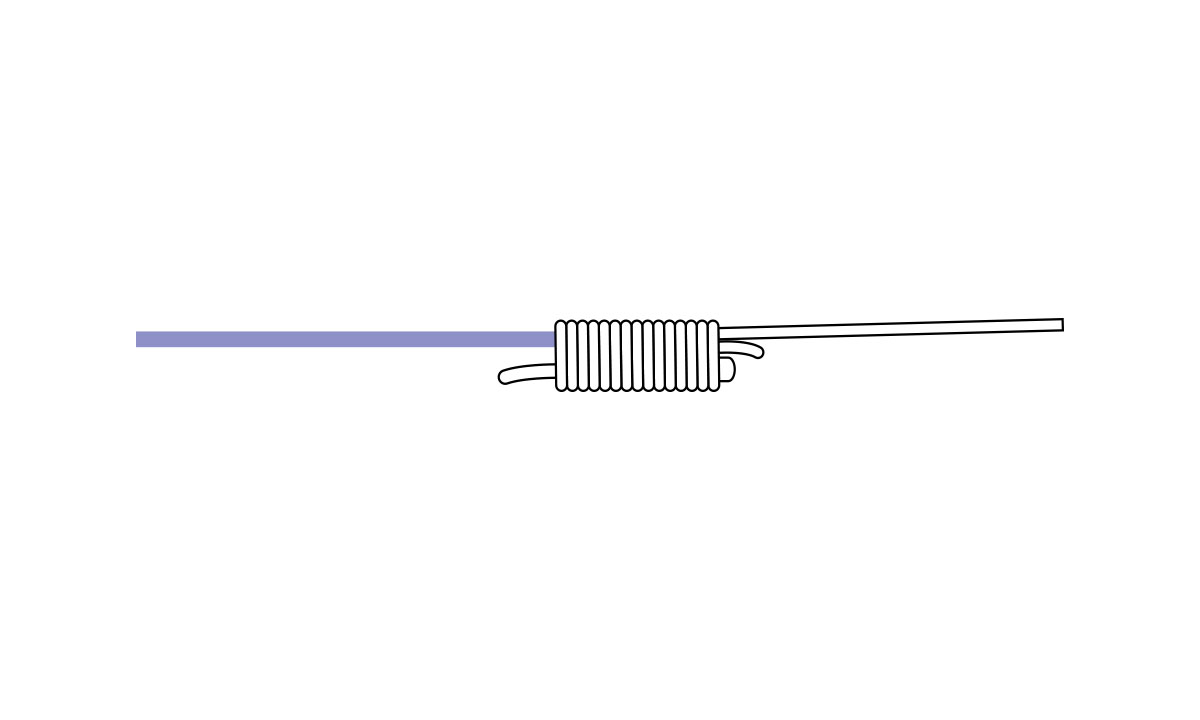
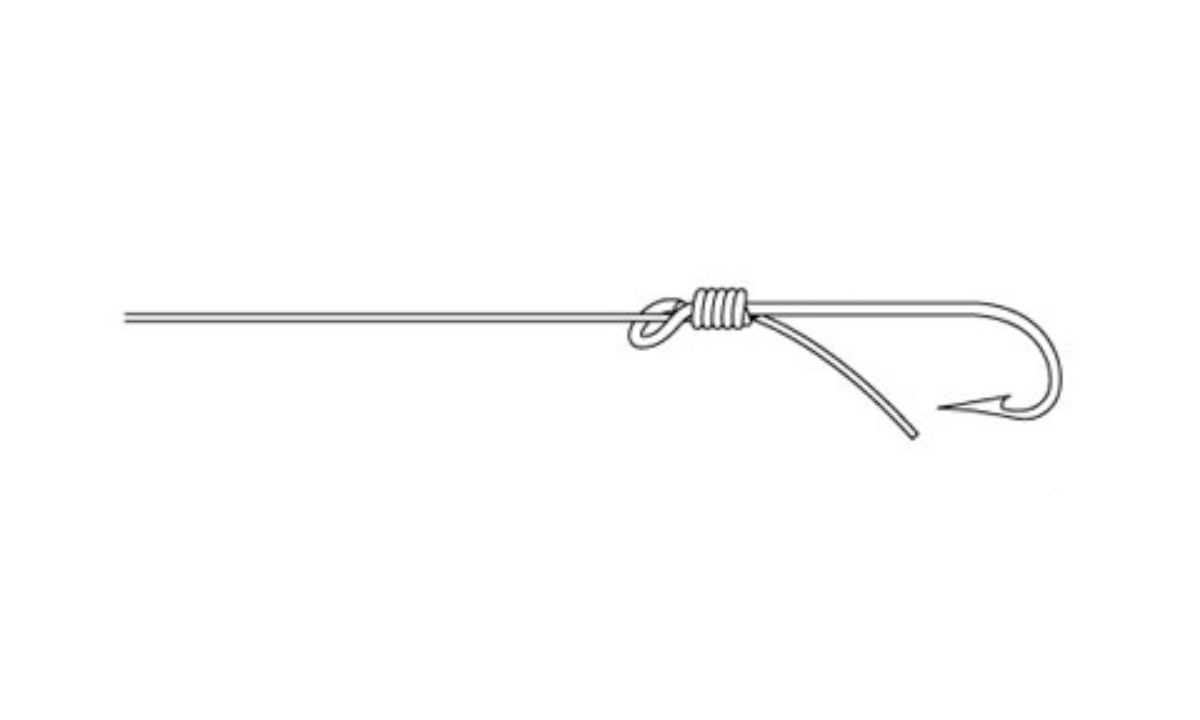
STEP 3: You have now tied two Uni knots. Pull the standing lines in opposite direction to slide the two knots together.

Double Unit knot

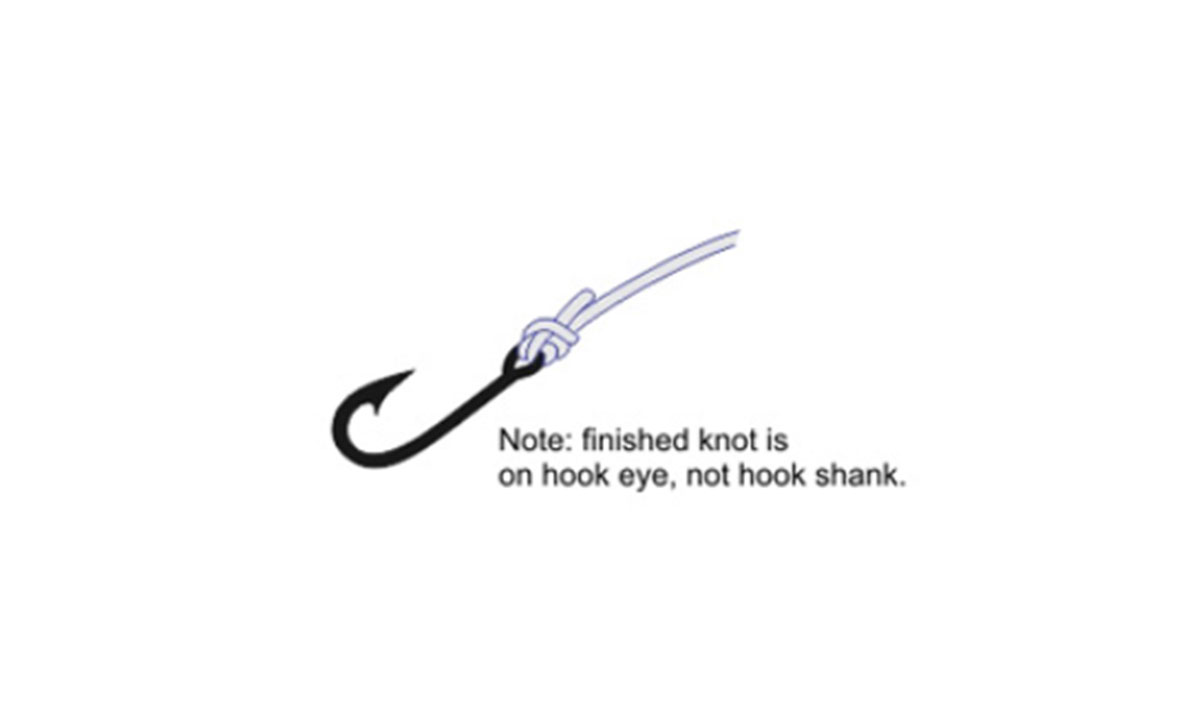
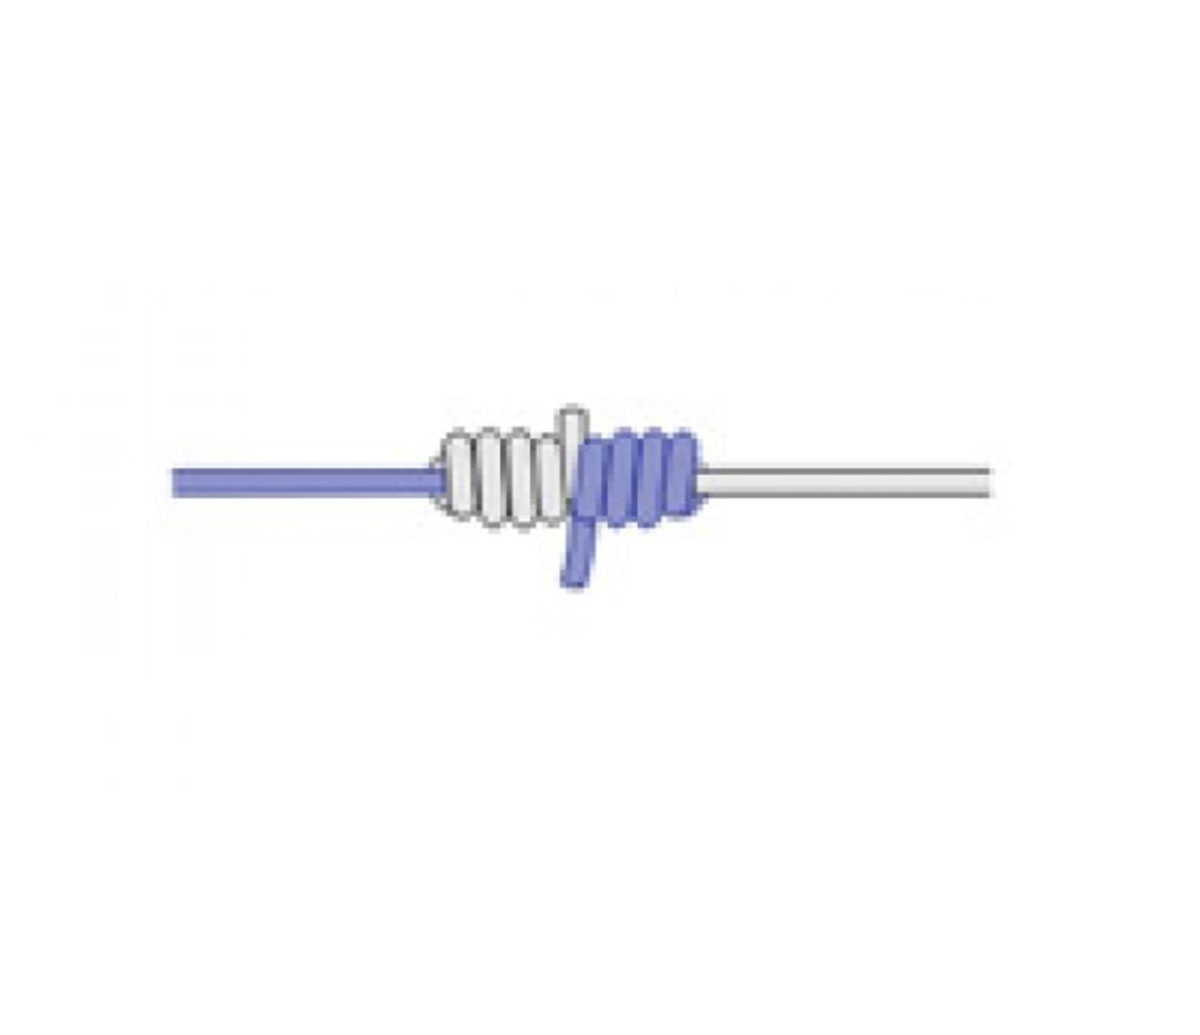
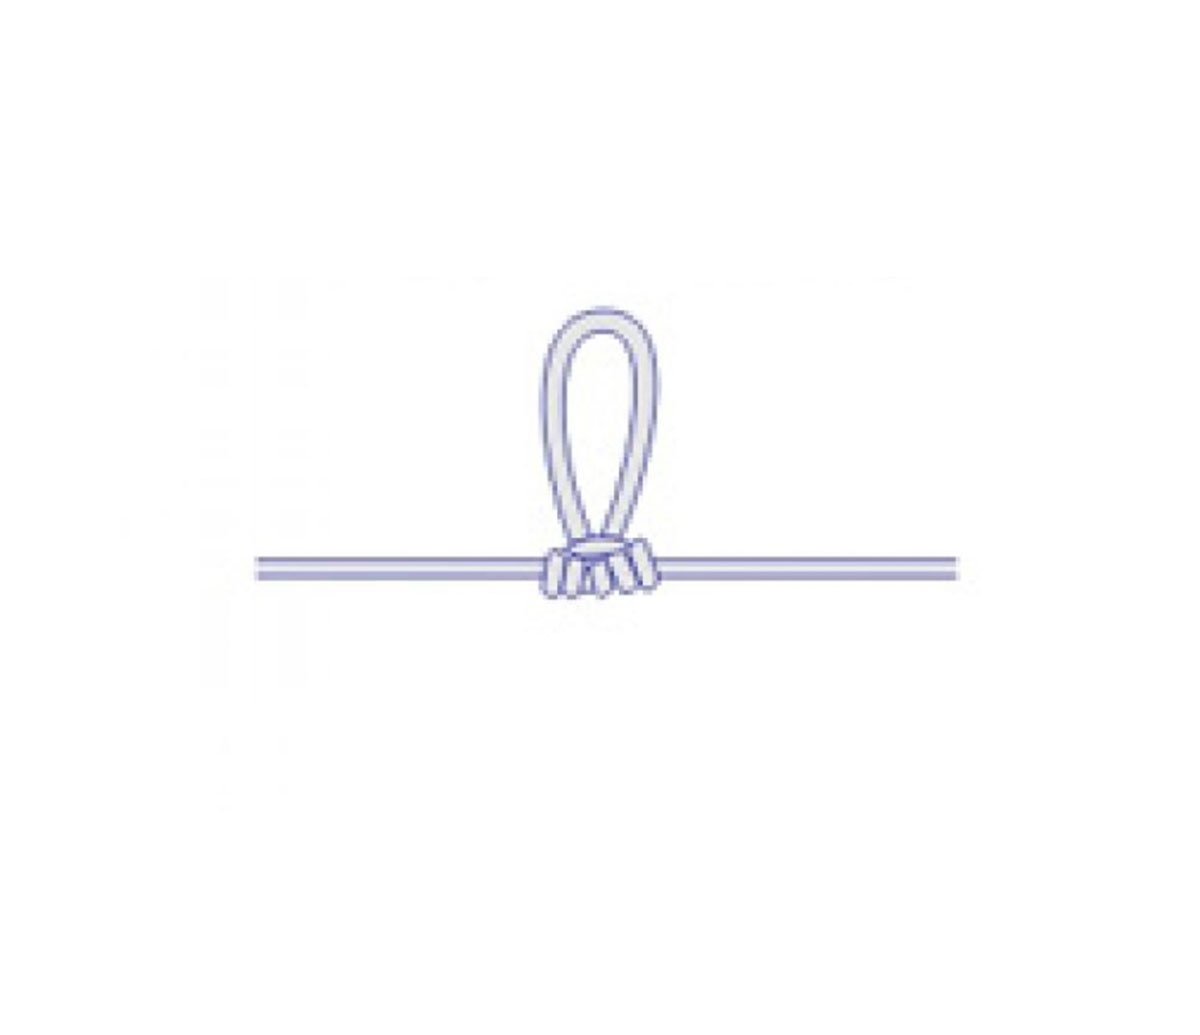
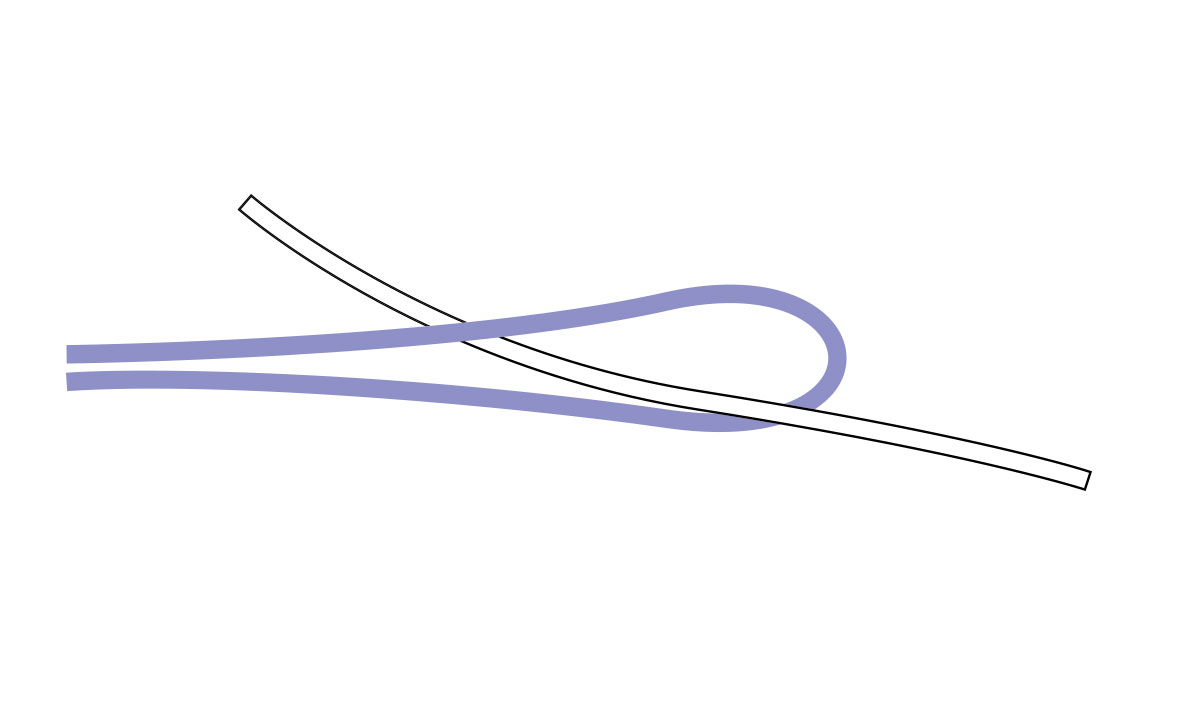
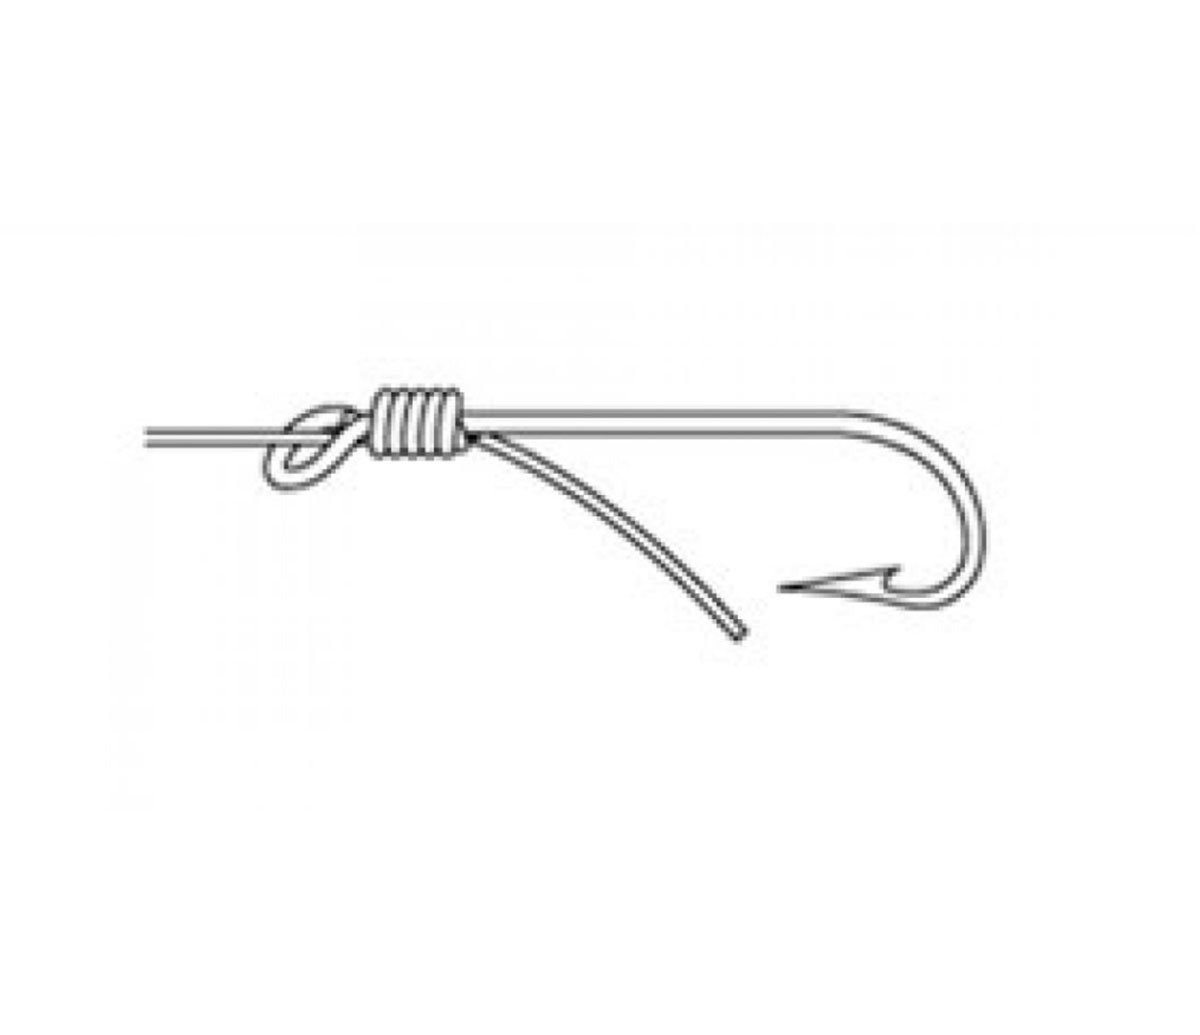
STEP 4: Clip ends close to the knot.


Surgeons knot

BEST FOR: When you need to quickly re-tie hooks and baits in the heat of the action. This knot is used by anglers in salt- and freshwater for joining lines of similar or different strengths. It works well, and some find it easier to tie than the Blood Knot.    

Surgeons knot
HOW TO TIE IT:

STEP 1:  Double the end of the line and tie a loose overhand knot.

Surgeons knot

STEP 2: Pass end of loop through the knot again.

Surgeons knot

STEP 3: Hold the standing line and tag end and pull the loop to tighten the knot. Clip tag end close.


Blood knot

BEST FOR: Joining two lines together, the Blood Knot is a tried and true fishing knot and a favorite of fly anglers. The strength of the knot is increased by making at least 5, and up to 7, wraps on each side of the knot. It works best with lines of approximately equal diameter.

Blood knot
HOW TO TIE IT:

STEP 1: Overlap ends of lines to be joined. Twist one around the other making 5 turns. Bring tag end back between the two lines.

Blood knot

STEP 2: Repeat with the other end of the line, wrapping in opposite direction the same number of turns.

Blood knot

STEP 3: Slowly pull lines in opposite directions. Turns will wrap and gather. Clip ends close to the knot.

Dropper knot


BEST FOR: 
Attaching additional flies, baits or jigs to a single fishing line. If the loop is tied particularly large, one side of the loop can be cut where it exits the knot, leaving a single strand line upon which baits can be tied directly. Created for bottom fishing, this is your knot for making the ever-popular drop shot rig used in bass fishing.    


STEP 1: Form a loop in the line at the desired location. Pass line from one side of loop through and around that side of loop. Make 5-plus wraps and keep new loop, which is formed, open.

Dropper knot

STEP 2: Push bottom of original loop up through new opening and hold with teeth. Wet knot with saliva and pull both ends in opposite directions.

Dropper knot

STEP 3: Pull ends of line evenly until coils tighten and loop stands out from line.


Albright knot


BEST FOR: 
Joining lines of greatly unequal diameters or different materials, such as monofilament to braids. It is easy to tie and should be in every angler’s knot arsenal. The Albright is well suited to slide readily through the guides when a fish pulls out enough line to reach your backing. Some anglers coat the knot with a rubber-based cement to make it even smoother and more secure.  
  

Albright knot
HOW TO TIE IT:

STEP 1: Make a loop in the heavier line and run about 10 inches of the lighter line through the loop.

Albright knot

STEP 2: Hold the 3 lines between your thumb and index finger behind the loop. Wrap the light line back over itself and both strands of the loop.

Albright knot

STEP 3: Make 10 tightly wrapped turns. Feed the tag end back through the loop and exit the loop the same side as it entered.

Albright knot

STEP 4: Hold both ends of the heavy line and slide the wraps to the end of the loop. Pull the light line to tighten and clip tag end close to the knot.


Snell knot


BEST FOR:
 Heavy cover bass fishing when a solid hookset is a must. There is no knot above the eye of the hook, which can help eliminate any grass or debris catching, as a knot above the eye can do. 


Snell knot
HOW TO TIE IT:

STEP 1: Thread 6 inches of line through the eye of the hook.

STEP 2: Hold the line against the hook's shank and form a Uni-Knot circle.

Snell

STEP 3: Make five (5) to seven (7) turns through the loop and around the standing line and hook's shank.

Snell knot

STEP 4: Tighten by pulling the standing line in one direction and the tag end in the other.


NAUTICAL KNOTS

Bowline Knot

BEST FOR: Any nautical need. One of the most useful boating rope knots you can know. The Bowline knot forms a secure loop that will not jam and is easy to tie and untie. The Bowline is most commonly used for forming a fixed loop, large or small at the end of a line. Tried and tested over centuries, this knot is reliable, strong and stable. Even after severe tension is applied it is easy to untie. It is said to retain 60 percent of the strength of the line in which it is tied.    

Bowline Knot
HOW TO TIE IT:

STEP 1: Double 6 inches of line and pass end of loop through eye of hook.

Bowline Knot
HOW TO TIE IT:

STEP 1: Double 6 inches of line and pass end of loop through eye of hook.

Bowline Knot

STEP 2: Bring the free end up to and pass through the eye from the under side (the rabbit comes out of the hole).

FIND YOUR NEAREST BASS PRO SHOPS/CABELA'S BOATING CENTER

Related Articles

Tahoe Boat Parked
Choosing Between Outboard and Sterndrive Power

Life is good. You have just decided to buy a new TAHOE sport boat. There it sits in the showroom, ready to be all yours. You envision warm, sunny days on the water with the family in the boat of your dreams. There is nothing left to do but give the nod to the sales consultant and close the deal, right?

We're everywhere you need us to be.